Kickstart Your Digital Teaching Journey
Ready to transform your classroom with technology integration lesson plans? In this listicle, you'll discover eight practical strategies—from the SAMR model and TPACK framework to flipped learning and digital storytelling—that boost engagement, support diverse learners, and streamline assessment. Each approach explains core principles, real-world applications, and quick-start tips so you can adapt lessons to coding bootcamps, software development courses, art studios, or tech entrepreneurship workshops. Whether you're an experienced developer, a creative technologist, an educator, or a student, these targeted methods will help you craft lessons that enhance collaboration, critical thinking, and project-based learning. Skip the fluff and dive straight into actionable ideas designed for modern teaching environments.
1. SAMR Model Integration
The SAMR (Substitution, Augmentation, Modification, Redefinition) model is a proven framework for designing technology integration lesson plans that progress from simple tool replacement to transformative learning experiences. Developed by Dr. Ruben Puentedura, SAMR helps educators evaluate how digital tools impact student outcomes—moving beyond mere digitization of worksheets to reimagining entire projects that were previously impossible without technology.
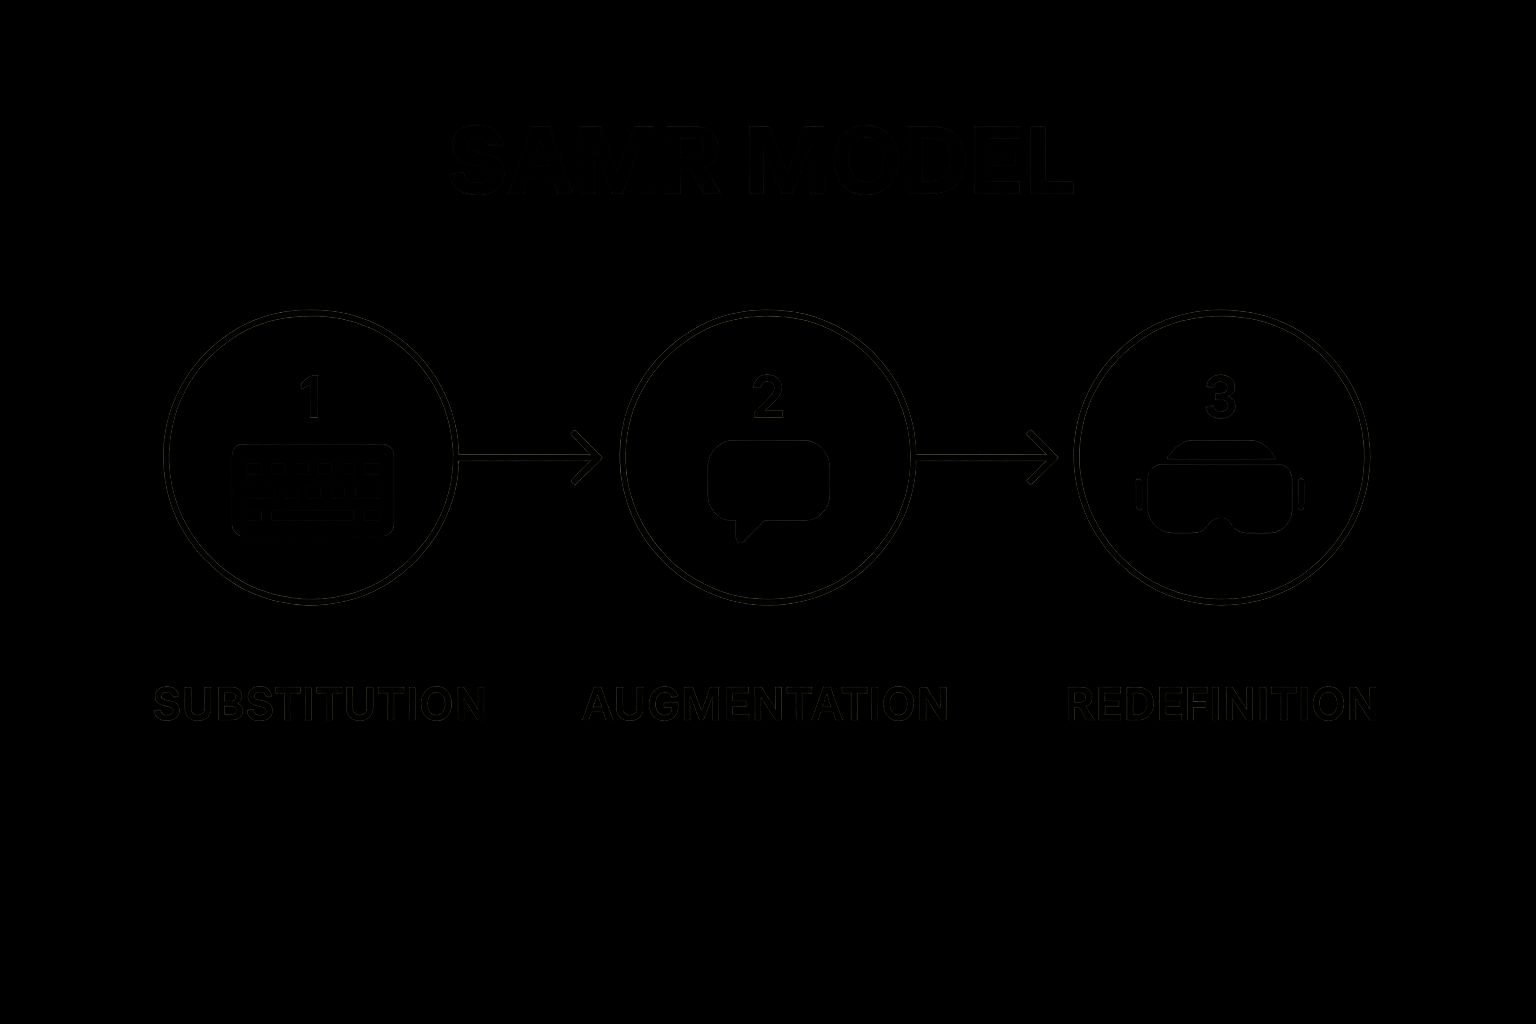
By mapping each activity to one of four levels—Substitution, Augmentation, Modification, Redefinition—teachers can scaffold their technology integration lesson plans, ensuring that each step adds genuine value. Whether you’re an aspiring vibe coder exploring creative tools or an experienced educator seeking to deepen engagement, SAMR provides a clear pathway for growth.
Below is an infographic illustrating the four-step process flow of SAMR. It visualizes how a simple substitution can evolve into a fully redefined learning task, highlighting the progressive nature of technology integration.
The diagram walks through each level:
- Substitution – direct tool swap
- Augmentation – added functionality
- Modification – significant task redesign
- Redefinition – creating new tasks once inconceivable
This workflow emphasizes that effective technology integration is a sequential journey: you build confidence at the Substitution level before attempting transformative Redefinition projects.
Features and Benefits
- Four progressive levels of technology integration, offering a scaffolded growth path
- Focuses on transforming learning rather than just using digital tools
- Empowers teachers to evaluate how technology enhances learning objectives
- Applicable across all subjects and grade levels, from coding workshops to digital art studios
Why it earns its spot in our “technology integration lesson plans” listicle: SAMR is both intuitive and rigorous, guiding educators to move from basic digital substitutions to groundbreaking, student-centered experiences.
Real-World Examples
- Substitution: Students type essays in Google Docs instead of handwriting.
- Augmentation: Peers leave real-time comments in Docs, speeding up feedback cycles.
- Modification: Learners create interactive multimedia presentations using Prezi or PowerPoint.
- Redefinition: Classroom teams design virtual reality environments in CoSpaces to simulate historical events.
Pros and Cons
Pros:
- Straightforward, easy-to-understand framework
- Encourages reflective, goal-oriented technology use
- Helps identify when tech actually boosts learning outcomes
- Versatile across disciplines—from digital art to entrepreneurship
Cons:
- Risks oversimplifying the pedagogy–tech relationship
- May pressure teachers to always aim for “Redefinition”
- Doesn’t inherently address engagement strategies or assessment design
- Effective implementation often requires targeted professional development
Actionable Tips for Educators
- Start Small: Launch with Substitution tasks to build confidence—e.g., swap paper quizzes for Google Forms.
- Align Objectives First: Define clear learning goals, then choose the appropriate SAMR level.
- Reflect and Iterate: Use the SAMR lens to audit existing lesson plans and pinpoint opportunities for deeper integration.
- Collaborate: Partner with tech-savvy colleagues to brainstorm Redefinition-level projects that leverage VR, AR, or collaborative platforms.
- Seek PD: Enroll in ISTE workshops (https://www.iste.org/) or Apple Education webinars to deepen your SAMR practice.
When and Why to Use SAMR
Implement the SAMR model when you want a structured roadmap for elevating your technology integration lesson plans. It’s especially valuable in environments where teachers are moving from traditional to blended or fully digital classrooms. By following SAMR, you ensure that each tech-infused activity is purpose-driven—maximizing student engagement and fostering innovative skills rather than using gadgets for their own sake.
For more on the SAMR framework, visit Dr. Ruben Puentedura’s site at http://hippasus.com. Whether you’re crafting first-grade coding lessons or advanced digital art modules, SAMR transforms your technology integration lesson plans into dynamic, future-ready learning experiences.
2. TPACK Framework Implementation
The TPACK (Technological Pedagogical Content Knowledge) framework is a research-driven model that helps educators design technology integration lesson plans by balancing three core domains:
- Content Knowledge (CK): Mastery of the subject matter
- Pedagogical Knowledge (PK): Methods and processes of teaching and learning
- Technological Knowledge (TK): Proficiency with digital tools and resources
By focusing on the intersections—Pedagogical Content Knowledge (PCK), Technological Content Knowledge (TCK), Technological Pedagogical Knowledge (TPK)—and the central overlap (TPACK), teachers can craft lessons where technology enhances pedagogy and deepens content understanding.
How It Works
- Map Your Knowledge
Sketch a Venn diagram to identify your strengths and gaps across CK, PK, and TK. - Design Around Overlaps
Choose activities that leverage multiple domains. For example, a simulation (TK) that lets students manipulate chemical bonds (CK) through guided inquiry (PK). - Iterate and Reflect
After teaching, use the TPACK lens to evaluate which domain intersections were strong and where adjustments are needed.
Why Use TPACK for Technology Integration Lesson Plans
- Holistic Approach: Ensures you’re not just adding tech for novelty but embedding it purposefully.
- Teacher-Centered: Highlights the professional knowledge required, making integration sustainable rather than ad hoc.
- Common Vocabulary: Creates shared language among educators, coaches, and administrators when discussing lesson design.
When to Apply
- Curriculum Redesign: At the start of a new unit or semester when you’re rethinking how technology can support learning goals.
- Professional Development: As a framework for workshops or coaching cycles to deepen teacher expertise.
- Pilot Programs: When testing new digital tools, the TPACK model helps you anticipate pedagogical challenges and content alignment.
Examples of Successful Implementation
- Chemistry Simulations: Science teachers use interactive molecular modeling software. Students adjust bond lengths and angles while following inquiry-based prompts.
- Digital Storytelling in English: Learners script, record, and edit multimedia narratives, applying literary analysis (CK) through collaborative online platforms (TK) under explicit writing guidelines (PK).
- Real-Time Graphing in Math: Students explore algebraic functions by dragging sliders on graphing apps, instantly visualizing how equation changes affect curves.
- History Digital Museums: In social studies, pupils curate primary source images, audio clips, and text into virtual exhibit pages, developing research skills (PK) while engaging with historical content (CK).
Tips for Educators
- Start with what you know—pick a content area or tech tool you’re comfortable with and expand outward.
- Collaborate with instructional designers or tech coaches to shore up weaker domains.
- Use TPACK as a reflection tool post-lesson: What knowledge intersection held strongest? Where did you struggle?
- Develop lesson plan templates that explicitly ask you to address CK, PK, and TK components before teaching.
Pros and Cons
Pros:
- Acknowledges teaching’s complexity and supports intentional tech use
- Identifies professional development needs
- Provides a shared framework for teams
Cons:
- Can feel conceptually dense and time-consuming to implement fully
- Requires a high level of teacher knowledge in multiple domains
- Difficult to measure “TPACK quality” without robust rubrics
This framework deserves its place in every list of technology integration lesson plans because it doesn’t just tell you to use technology—it shows you how to integrate it meaningfully, ensuring that every digital tool serves both pedagogy and content goals.
Learn more about TPACK Framework Implementation
For a deeper dive into resources, case studies, and planning templates, visit our full library at https://www.vibecoding.vip/resources/.
3. Blended Learning Station Rotation
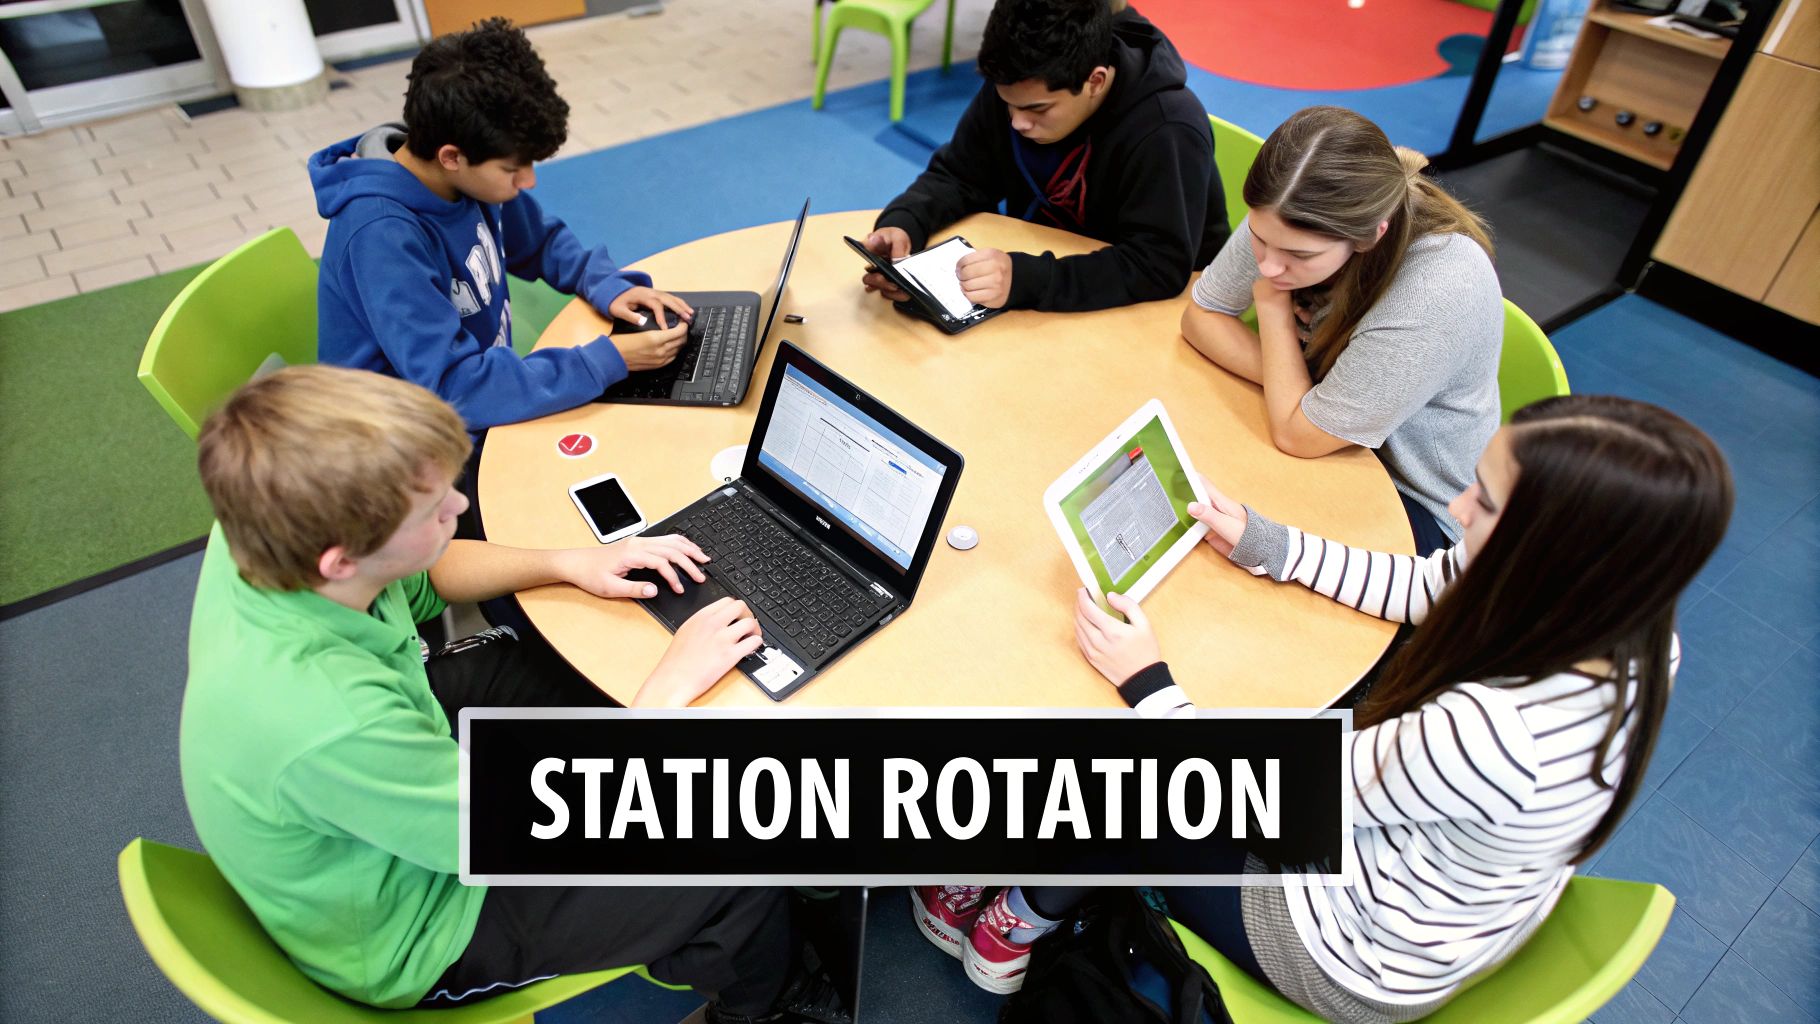
The Blended Learning Station Rotation model is a powerful strategy for technology integration lesson plans. In this approach, students cycle through a series of stations—each with a different instructional mode—while at least one station leverages digital tools for independent learning. By structuring rotations with clear timing and roles, teachers can differentiate content, provide targeted small-group support, and foster student autonomy. This model balances direct instruction with self-paced, technology-driven tasks, making it ideal for diverse learners in tech-focused environments.
What It Is and How It Works
- Station Setup
- 2–6 stations in your classroom or virtual breakout rooms
- Each station has a clear learning objective—e.g., concept review, collaborative design, coding practice, digital simulation
- One station is dedicated to independent technology use (adaptive software, virtual labs, coding sandboxes)
- Structured Rotations
- Timed intervals (5–20 minutes) signaled by visual timers or audio cues
- Students rotate in small groups or individually
- Teacher spends most time at the “teacher-led” station for direct instruction and formative checks
- Technology Integration
- Adaptive literacy/math apps, coding platforms (e.g., Scratch, Replit), digital art tools
- Virtual reality or simulation software for immersive experiments
- Learning management system (LMS) tracks student progress in real time
Why and When to Use Station Rotation
- Differentiation: Tailor tasks to students’ skill levels—ideal for mixed-ability tech classes
- Engagement: Varied activities prevent screen fatigue and sustain focus
- Resource Efficiency: Maximizes limited devices by staggering digital-station use
- Skill Building: Promotes self-management, collaborative problem solving, and digital literacy
Use this model when you have access to at least a small set of devices, a clear set of learning goals, and learners who can manage independent tasks for short bursts.
Examples of Successful Implementation
- Elementary Reading Block: Station A—teacher-led guided reading; B—silent independent reading; C—adaptive literacy software.
- Middle School Math: Station A—mini-lesson on graph theory; B—peer-to-peer problem solving; C—online practice with immediate feedback.
- High School Science: Station A—brief direct instruction on chemical reactions; B—VR lab simulation; C—group data analysis and reporting.
Key Features and Benefits
- Multiple, clearly labeled stations with distinct instructional methods
- Seamless integration of digital and hands-on learning activities
- Built-in accountability through exit tickets, digital badges, or LMS checkpoints
- Balanced teacher-led and student-driven segments for optimal support
- Scalable design: start simple, then layer in complexity and technology
Pros and Cons
Pros:
- Differentiates instruction and personalizes learning paths
- Creates targeted small-group instruction opportunities
- Increases engagement through variety and novelty
- Builds student independence, time management, and digital skills
- Efficient use of limited tech resources
Cons:
- High planning and classroom management demands
- May overwhelm younger students without strong routines
- Requires reliable device access and network connectivity
- Potential for increased noise or off-task behavior during transitions
Actionable Tips for Educators
- Start Small: Launch with 2–3 stations to refine timing and transitions.
- Visual Supports: Use color-coded signs, timers, and “next station” cards to minimize downtime.
- Station Cards: Provide clear, step-by-step instructions and troubleshooting tips at each station.
- Monitor & Adjust: Use quick digital formative checks (polls, quizzes) to gauge understanding.
- Accountability Measures: Incorporate short reflection prompts or digital logs for each station’s work.
This Blended Learning Station Rotation model deserves its spot in any list of technology integration lesson plans because it combines targeted teacher support with flexible, student-centered digital experiences. For more on the origins and research behind station rotation, visit the Christensen Institute’s website: https://www.christenseninstitute.org/blended-learning/.
4. Project-Based Learning with Technology (PBL-Tech)
Project-Based Learning with Technology (PBL-Tech) marries the inquiry-driven, student-centered approach of PBL with purposeful digital tools to enrich research, collaboration, creation, and presentation. In a well-designed PBL-Tech unit, students tackle authentic driving questions or real-world challenges over an extended period, leveraging technology at every phase—ideation, investigation, iteration, and reflection—to produce high-quality digital artifacts that demonstrate deep mastery.
How It Works
- Define the Driving Question or Challenge
Start with a meaningful problem (e.g., “How can we reduce plastic waste in our community?”). - Plan and Integrate Digital Tools
Map technology to each project stage: mind-mapping software for brainstorming, collaborative docs for research, design tools for prototyping, video editors or web builders for final products. - Structured Milestones & Checkpoints
Set synchronous and asynchronous deadlines (proposal, research report, prototype, peer review). Use LMS reminders, digital calendars, or project-management apps. - Authentic Audience & Reflection
Publish artifacts (websites, podcasts, videos) for community stakeholders or virtual experts. Embed reflection prompts in e-journals or blogs.
Why This Belongs in “Technology Integration Lesson Plans”
PBL-Tech elevates lesson plans far beyond “sit-and-get” by positioning technology as a learning partner—not just a delivery method. It builds 21st-century skills (critical thinking, digital literacy, cross-cultural collaboration) alongside content knowledge, boosting engagement and ownership. When thoughtfully scaffolded, PBL-Tech addresses diverse learning styles and provides multiple entry points for students to shine.
Successful Implementation Examples
- Middle school teams produce documentary films about local water-quality issues, interviewing experts via video conference and editing in iMovie.
- High school economics classes develop digital business plans with online financial-modeling tools and pitch them to local entrepreneurs.
- Elementary students design a virtual museum exhibit on community history, using 3D-tour builders and voice-over narration.
Pros and Cons
Pros:
• Heightened student engagement and agency
• Authentic context for technology use
• Flexible differentiation through varied project paths
• Meaningful digital artifacts portfoli o
Cons:
• Time-intensive planning and facilitation
• Alignment challenges with standardized assessments
• Requires both teacher and student tech fluency
• Potential digital-divide issues outside the classroom
When and Why to Use PBL-Tech
Use PBL-Tech when you want learners to:
- Apply interdisciplinary skills to solve community-based challenges
- Develop digital portfolios that showcase transferable competencies
- Engage deeply with content through student choice
Employ this approach at the start of a semester, during capstone terms, or as a culminating unit that ties together discrete standards into a cohesive, real-world problem.
Actionable Tips for Effective PBL-Tech
- Begin with the end in mind: craft clear learning goals and define the format of your final digital product.
- Offer a curated menu of tech-tool options aligned to each project phase (e.g., Google Slides or Canva for presentations).
- Build in peer-review and reflection protocols at each milestone—use digital annotation tools or online discussion boards.
- Connect learners with outside experts (community partners, industry mentors) via video conferencing platforms.
- Develop transparent rubrics that assess both content mastery and technology application.
This method stands out among technology integration lesson plans for its seamless blend of inquiry, digital fluency, and authentic audience engagement. Ready to dive deeper? Learn more about Project-Based Learning with Technology (PBL-Tech)
5. Digital Formative Assessment Cycle
The Digital Formative Assessment Cycle integrates technology tools to continuously gather, analyze, and respond to evidence of student learning during instruction. By embedding quick checks and in-the-moment feedback directly into your technology integration lesson plans, you empower both teachers and students with real-time insights. This ongoing cycle—assess, analyze, adjust, and reteach—ensures that instruction remains responsive and personalized.
What It Is and How It Works
- Assess: During a lesson, students complete a quick digital check (e.g., a 3-question quiz in Google Forms or a live poll in Kahoot!).
- Analyze: The platform instantly aggregates results and highlights areas of strength or misconception.
- Adjust: Teachers view dashboards in tools like Formative (https://www.formative.com) or Nearpod (https://www.nearpod.com) and pivot their instruction—revisiting a concept, offering an extension activity, or regrouping learners.
- Reteach/Extend: Based on data, students follow adaptive learning paths, complete targeted micro-lessons, or engage in peer-supported exercises.
This cycle repeats throughout a unit, creating a feedback loop that supports mastery and growth.
Why It Belongs in Your Technology Integration Lesson Plans
- Data-Driven Instruction: Immediate actionable data empowers teachers to make instructional decisions on the fly rather than waiting for end-of-unit tests.
- Student Agency: By granting students access to their own performance dashboards, you foster self-assessment and goal-setting skills—critical for coders, creative technologists, and lifelong learners.
- Scalable Feedback: Automating the grading of objective items reduces teacher workload, freeing you to provide richer, qualitative feedback on projects and portfolios.
Key Features & Benefits
- Real-time data collection on student understanding
- Digital tools for quick feedback and response (e.g., Kahoot!, Quizizz, Socrative)
- Adaptive learning paths based on assessment results
- Student access to performance data dashboards
- Multiple formats for demonstrating understanding (forms, polls, videos on Flipgrid)
- Integration with learning management systems (Canvas, Schoology, Google Classroom)
Benefits: immediate intervention, personalized learning, record of progress over time, development of metacognitive skills.
Pros and Cons
Pros
- Provides immediate, actionable data for instructional decisions
- Reduces grading workload while increasing feedback frequency
- Allows for personalized intervention and extension
- Develops student self-assessment skills
- Creates a digital record of progress over time
Cons
- Requires reliable technology infrastructure (devices + Wi-Fi)
- Can lead to over-testing if not balanced with project-based tasks
- Potential to focus on easily measurable concepts over deeper skills
- May require paid subscriptions (Formative, Pear Deck, Nearpod)
- Data privacy and security must be managed carefully
Examples of Successful Implementation
- Kahoot! Daily Check-Ins: A high-school computer science teacher launches each lesson with a 5-question Kahoot! quiz, then uses results to form skill-based coding pairs.
- Google Forms with Conditional Branching: In a digital art class, artists submit concept sketches via Forms. Conditional logic sends students down different critique or extension pathways.
- Flipgrid Video Reflections: After a day of C# game development, students record a 60-second reflection on Flipgrid, allowing the instructor to gauge confidence in new syntax.
- Nearpod Embedded Assessments: A robotics instructor weaves formative polls and drag-and-drop checks right into lesson slides, adjusting live based on student responses.
Actionable Tips for Educators and Technologists
- Start Simple: Introduce one tool (e.g., Google Forms) before layering in more complex platforms like Formative or Edpuzzle.
- Design for Thinking: Ask questions that uncover student reasoning (“Why did you choose this algorithm?”) rather than only correct/incorrect checks.
- Establish Routines: Set predictable times for digital check-ins—at lesson start, mid-point, and exit—to normalize the cycle.
- Teach Data Literacy: Show students how to read charts and set SMART goals based on their own performance dashboards.
- Balance Feedback Modes: Mix automated quizzes with personalized teacher comments or peer reviews to maintain a human touch.
- Use Data for Grouping: Reconfigure small groups on the fly according to real-time results for targeted reteaching or acceleration.
When and Why to Use This Approach
- When: Ideal during units with challenging new content (e.g., learning a new programming paradigm, exploring advanced digital design tools) or in flipped/blended environments.
- Why: To catch misconceptions early, personalize pathways for a diverse group of learners (from aspiring vibe coders to digital artists), and maintain engagement with immediate feedback loops.
By weaving the Digital Formative Assessment Cycle into your technology integration lesson plans, you create a dynamic classroom ecosystem—one where data and student voice guide every instructional decision.
6. Universal Design for Learning (UDL) with Technology
Universal Design for Learning (UDL) with Technology is an instructional framework that builds flexibility into technology integration lesson plans, ensuring every learner—regardless of ability or background—can access, engage with, and demonstrate understanding of digital content. Grounded in the three UDL principles (multiple means of engagement, representation, and action/expression), UDL with Technology uses digital tools and supports to proactively remove barriers rather than retrofitting accommodations.
How It Works
- Multiple Means of Engagement
• Offer interactive polls, choice boards, or gamified apps to tap into learners’ interests. - Multiple Means of Representation
• Provide lecture notes as editable text, narrated audio, and video transcripts. - Multiple Means of Action & Expression
• Allow students to submit a podcast, infographic, or screencast instead of a traditional essay.
By weaving these principles into your technology integration lesson plans, you create a dynamic learning environment where students take ownership of their learning paths.
Features & Benefits
- Digital Content Options: Text, audio, video, interactive simulations
- Varied Demonstrations: Blogs, slideshows, code repos, digital art portfolios
- Built-In Scaffolds: Closed captions, text-to-speech, chunking, graphic organizers
- Assistive Technologies: Screen readers, speech-to-text, alternative input devices
- Accessible Design: Alt text for images, high-contrast themes, keyboard navigation
- Learner Choice: Tool menus and preference surveys
Benefits include:
- Increased accessibility for learners with disabilities
- Reduced need for individual accommodations
- Development of student agency and self-advocacy
- Engagement across diverse learning styles
- Simultaneous technology skill building and content mastery
When & Why to Use UDL with Technology
Use UDL when you want to:
- Reach diverse learners in inclusive classrooms
- Streamline planning by incorporating multiple modalities up front
- Foster independence through student choice and transparency
- Align with legal frameworks (IDEA, ADA) and best-practice accessibility guidelines
Examples of Successful Implementation
- A high school coding class offers tutorials in written walkthroughs, screencast videos, and live coding jams—students pick their preferred format to learn a new JavaScript library.
- In a digital art course, learners can submit a final project as a GIF animation, a narrated slideshow, or an interactive HTML portfolio—each submission type is supported with scaffolded checklists.
- A university professor designs a math tutorial using an accessible e-text platform that adjusts lexile levels, integrates voice narration, and auto-generates practice quizzes based on student performance.
Actionable Tips
- Leverage built-in accessibility checkers in Google Workspace and Microsoft 365.
- Assemble a “Tech Menu” of apps and platforms, mapping each to a UDL principle.
- Train students early on how to enable captions, use screen readers, or adjust display settings.
- Pilot one UDL principle per unit—gradually layer in engagement, representation, and expression strategies.
- Partner with special education or assistive-tech specialists to vet your digital materials.
- Design digital choice boards that maintain equivalent rigor across each option.
Pros and Cons
Pros
- Empowers all students through proactive inclusivity
- Lowers reliance on time-consuming, individualized accommodations
- Builds lifelong digital literacy and self-advocacy
- Appeals to multiple learning modalities concurrently
Cons
- Requires significant upfront planning and content creation
- Can overwhelm novices with too many choices at once
- Demands teacher fluency in accessibility features and assistive tools
- May need additional hardware or software licensing
Why It Deserves Its Place
Universal Design for Learning with Technology is not just a compliance strategy—it’s a forward-thinking blueprint for equity and innovation in your technology integration lesson plans. By embedding choice, adaptability, and accessibility from day one, you create a classroom ecosystem where every learner thrives, digital barriers fall, and creativity flourishes.
For more resources, visit the official UDL website at https://www.cast.org.
7. Flipped Learning Model
The Flipped Learning Model reverses the traditional “lecture in class, homework at home” dynamic by delivering core instructional content through digital channels before face-to-face sessions. In a technology integration lesson plan, this approach leverages videos, interactive modules, and LMS tools to allow students to absorb foundational material at their own pace. Class time is then repurposed for active learning, collaborative problem-solving, deeper discussions and one-on-one coaching.
How It Works
- Pre-Class Digital Content
• Teachers record short (5–10 minute) videos or curate interactive readings/quizzes.
• Content is delivered via an LMS (Google Classroom, Canvas, Moodle) or platforms like Khan Academy. - In-Class Active Learning
• Students arrive prepared to dive into hands-on projects, lab simulations, peer instruction, or code reviews.
• The teacher acts as a facilitator, differentiating support and probing for deeper understanding. - Ongoing Feedback & Tracking
• Integrate embedded questions (e.g., EdPuzzle) to gauge comprehension.
• Use analytics from your LMS to identify who needs extra support before or during class.
Key Features
- Digital content delivery prior to class
- Short, focused instructional videos or interactive modules
- Restructured teacher–student contact time for guided practice
- Integration with an LMS for assignment tracking and analytics
- Personalized support during in-class application activities
Successful Implementations
- High School Math: Teachers record worked-example videos, freeing class time for small-group problem solving. End-of-unit exam scores rose by 15%.
- Science Labs: Virtual simulations assigned as “pre-lab” ensure students come to class with key concepts, reducing safety incidents and boosting engagement.
- Language Arts: Digital readings with embedded comprehension checks let students annotate and discuss texts more deeply during class seminars.
- History Seminars: Curated documentary clips and guided questions spark richer in-class debates on cause and effect.
When & Why to Use
- When you want to shift from passive lectures to student-centered, inquiry-driven learning.
- Why it’s effective:
• Maximizes limited face-to-face time for higher-order thinking.
• Supports different learning speeds and styles.
• Builds a library of reusable digital resources.
• Enables data-driven interventions via LMS analytics.
Pros and Cons
Pros
- Students learn at their own pace and can revisit content anytime.
- Class time is devoted to application, collaboration, and critical thinking.
- Teachers can provide targeted, one-on-one support.
- Digital lessons become permanent resources for remediation or acceleration.
Cons
- Relies on students having reliable home internet/devices.
- Requires significant upfront time to create high-quality materials.
- Students in unstructured home environments may fall behind.
- Ensuring consistent completion of pre-class work can be challenging.
Actionable Tips for Your Technology Integration Lesson Plans
- Keep videos under 10 minutes and focused on a single concept.
- Embed quick comprehension checks (polls, quizzes) to maintain engagement.
- Set up clear accountability with short quizzes or reflection journals due before class.
- Design in-class activities that explicitly build on pre-class materials—avoid “reinventing the wheel.”
- Offer alternative access (downloadable MP4s, printed summaries) for students with limited connectivity.
- Pilot one unit before rolling out across your course to refine your workflow.
Why #7 Belongs on This List
The flipped learning model exemplifies innovative technology integration lesson plans by repurposing digital tools to deepen active learning and maximize valuable classroom time. It transforms the instructor’s role into that of a guide and coach, fosters learner autonomy, and provides rich data for continuous improvement.
For more inspiration, visit the Flipped Learning Network:
https://flippedlearning.org/
Or explore free content on Khan Academy:
https://www.khanacademy.org/
8. Digital Storytelling Across the Curriculum
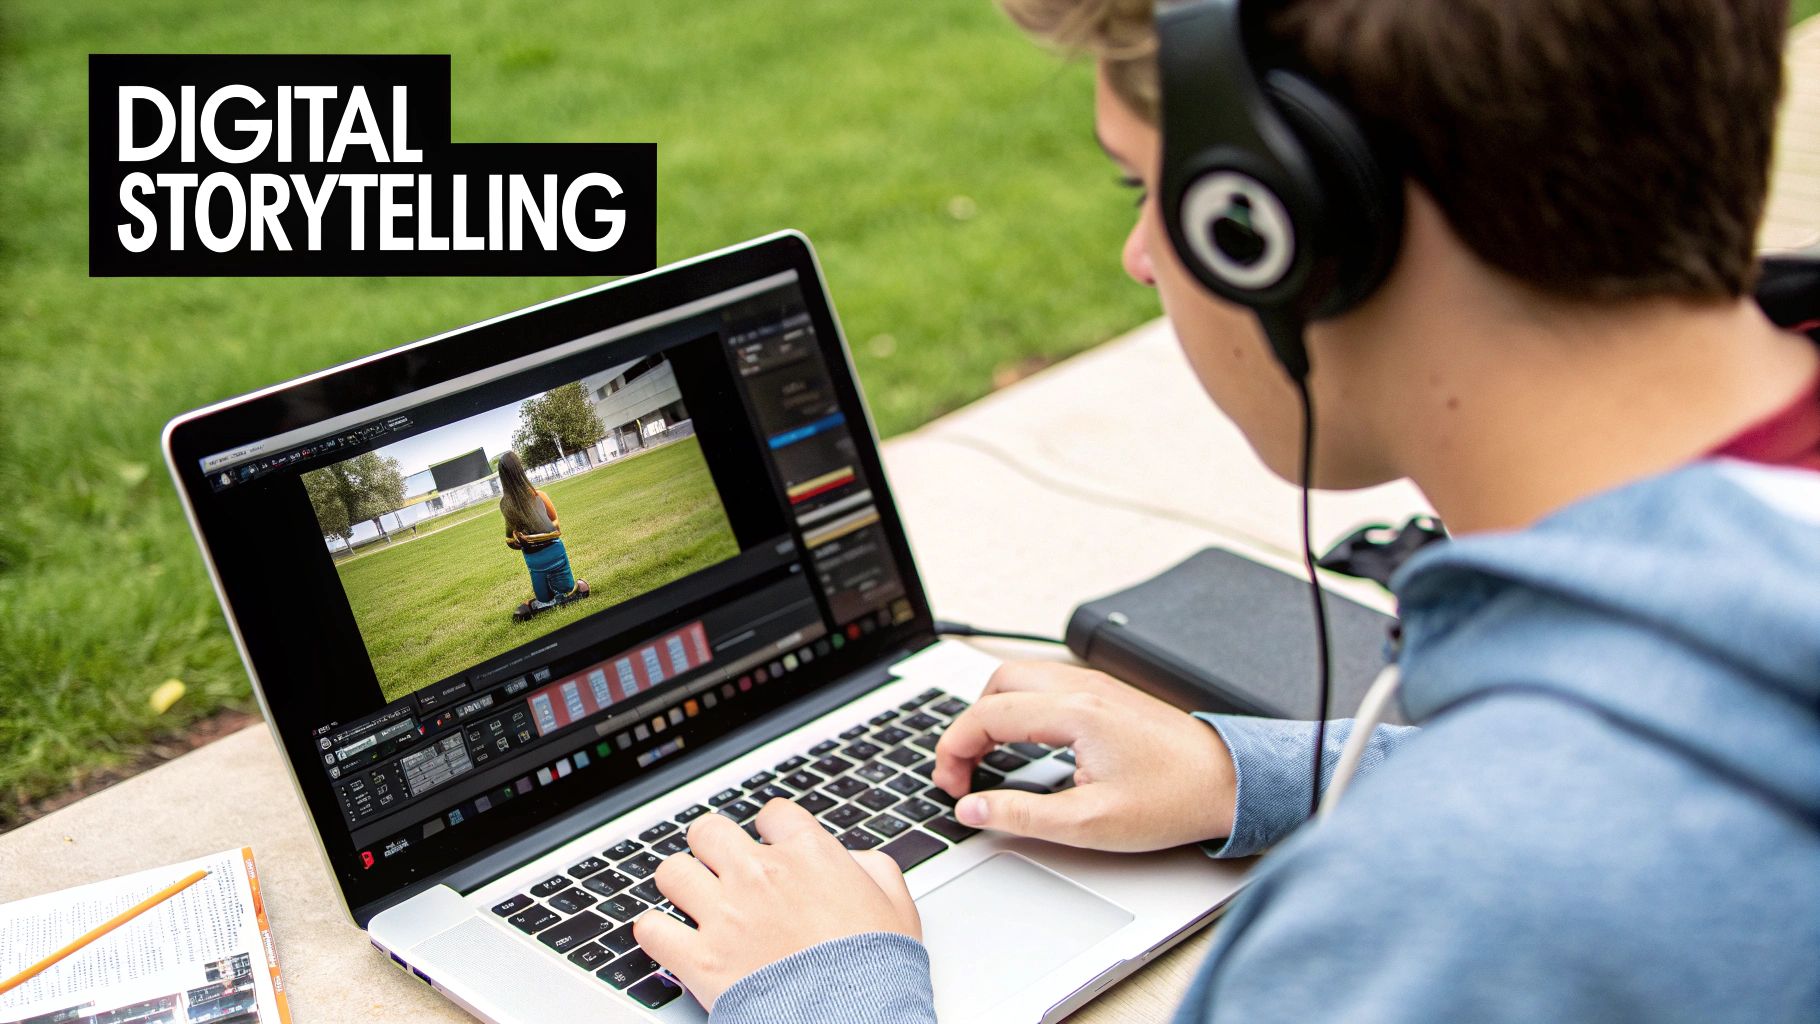
Digital Storytelling Across the Curriculum is a technology integration lesson plan approach that fuses traditional narrative techniques with digital media tools to empower students to tell compelling stories while mastering academic content. By weaving together text, audio, video, and images, students not only deepen their understanding of core subjects but also develop essential communication, digital literacy, and creative expression skills.
How It Works
Educators guide learners through every stage of the storytelling process—from brainstorming and storyboarding to scriptwriting and multimedia production. Students research a topic, craft a narrative framework, gather or create digital assets (photos, voiceovers, animations), and use user-friendly tools (e.g., iMovie, WeVideo, Adobe Spark) to assemble their digital stories. Final projects become shareable artifacts demonstrating both content mastery and student voice.
Why and When to Use Digital Storytelling
- Engage diverse learners: Appeals to visual, auditory, and kinesthetic strengths.
- Promote deeper learning: Narrative context helps students synthesize and apply content across disciplines—perfect for unit projects or capstone assignments.
- Foster 21st-century skills: Encourages collaboration, critical thinking, media literacy, and communication.
- Increase authenticity: Provides real-world purpose and audience for student work, boosting motivation.
Key Features & Benefits
- Integration of narrative elements with content knowledge for holistic learning
- Multimedia creation using various digital tools enhances technical proficiency
- Student voice and perspective foregrounded in content demonstration
- Combination of visual, audio, and textual elements for rich stories
- Cross-curricular applications—from science explainers to history documentaries
- Shareable digital artifacts that showcase learning and can be published or presented
Successful Implementation Examples
- Science: Animated videos explaining the water cycle from a water droplet’s POV.
- History: Documentary-style interviews with Revolutionary War figures using green-screen effects.
- Math: Screencast tutorials solving algebra problems, complete with voice narration and on-screen annotations.
- Language Arts: Short films adapting Shakespearean scenes, with student-authored scripts and digital backdrops.
- Foreign Language: Narrated travel guides to Spanish-speaking countries, blending cultural research and language practice.
Actionable Tips
- Start with storyboarding to map your narrative flow and media elements.
- Provide clear rubrics that assess both content accuracy and technical quality.
- Begin with simple tools (e.g., PowerPoint or an online slideshow maker) before advancing to complex editors.
- Curate a classroom media library of exemplars and royalty-free assets for inspiration.
- Teach ethical media use, including copyright, fair use, and proper attribution.
- Schedule regular sharing sessions so peers can give feedback and spark new ideas.
Pros
- Highly engaging through creative expression
- Develops digital literacy alongside content mastery
- Supports varied learning styles and strengths
- Creates memorable, emotionally resonant experiences
- Builds communication and presentation skills
- Offers authentic purpose and audience
Cons
- Time-intensive planning and implementation
- Requires teaching both storytelling and technical tools
- Potential tech troubleshooting can distract from content
- Assessment complexity with intertwined content and media components
- Equity issues with students’ access to devices and prior experience
Digital Storytelling Across the Curriculum earns its spot among top technology integration lesson plans by marrying deep content understanding with essential 21st-century skills. Through narrative and multimedia, it transforms passive lessons into an active, creative journey for every learner.
Learn more about Digital Storytelling Across the Curriculum
Technology Integration Strategies Comparison
| Strategy | Implementation Complexity 🔄 | Resource Requirements ⚡ | Expected Outcomes 📊 | Ideal Use Cases 💡 | Key Advantages ⭐ |
|---|---|---|---|---|---|
| SAMR Model Integration | Medium – progressive levels, needs PD | Moderate – tech tools and training | Improved tech integration and transformed learning | Tech integration growth, all subjects and grades | Clear framework, scalable tech integration |
| TPACK Framework Implementation | High – complex interconnections | High – deep teacher knowledge & PD | Holistic tech-pedagogy-content integration | Deep lesson planning where tech, pedagogy & content merge | Supports intentional tech use, common vocabulary |
| Blended Learning Station Rotation | High – planning and classroom mgmt | Moderate – tech + physical setup | Differentiation, personalized learning, engagement | Blended classrooms needing varied tech & group instruction | Increases engagement, efficient tech use, small group |
| Project-Based Learning with Tech | High – intensive planning & tech use | High – digital tools and facilitation | Student engagement, 21st-century skills, authentic products | Extended projects with tech-supported inquiry | Deep engagement, real-world relevance, digital artifacts |
| Digital Formative Assessment Cycle | Medium – ongoing digital data use | Moderate – reliable tech & platforms | Immediate feedback, personalized learning adjustments | Classes needing real-time assessment & feedback | Quick data, personalized interventions, student agency |
| Universal Design for Learning | High – extensive prep & accessibility | High – multiple digital/assistive tools | Accessible learning for diverse needs | Inclusive classrooms, special education integration | Reduces barriers, multiple access modes, student choice |
| Flipped Learning Model | Medium – content creation upfront | Moderate – video tools + LMS | More in-class active learning, flexible pacing | Classes leveraging pre-class digital content | Student-paced content, more active class time |
| Digital Storytelling Across Curriculum | Medium-High – tech & storytelling skills | Moderate – multimedia tools | Creative engagement, communication skill development | Cross-curricular creativity and content demonstration | Enhances digital literacy, creative expression |
Take Your Tech Integration Further
As you’ve explored each of the eight cornerstone approaches— from the SAMR Model and TPACK Framework to Blended Learning station rotations, PBL-Tech, the Digital Formative Assessment Cycle, UDL with technology, the Flipped Learning Model, and Digital Storytelling— you’ve built a solid foundation for powerful technology integration lesson plans. These strategies demonstrate how thoughtful design, purposeful tech use, and creative collaboration can transform any learning environment into an engaging, student-centered experience.
Key Takeaways
- SAMR and TPACK help you evaluate and enrich lessons at every level of tech infusion.
- Blended and flipped models keep learners active and accountable.
- PBL-Tech and digital storytelling unlock authentic, cross-curricular projects.
- Formative assessment cycles and UDL principles ensure every student thrives.
Actionable Next Steps
- Audit your current lesson plans through the SAMR and TPACK lenses to identify quick wins.
- Pilot a blended station rotation or flipped lesson next week—use Vibecoding VIP’s curated resources for turnkey activities and templates.
- Design a PBL-Tech unit around a real-world challenge, then integrate digital formative checkpoints to guide students.
- Apply UDL guidelines and storytelling tools to make content accessible and meaningful to all learners.
- Gather feedback, iterate, and share your successes with peers in tech-education communities.
Why Mastering These Concepts Matters
By honing your skill set in technology integration lesson plans, you empower students to think critically, collaborate effectively, and solve complex problems. You’ll foster digital citizenship, encourage creativity, and build resilience—preparing learners for an ever-evolving world of code, art, and innovation.
Broader Impact
Every lesson you enhance ripples beyond the classroom walls: aspiring vibe coders find their spark, experienced developers refine their pedagogy, digital artists tell richer stories, and entrepreneurs prototype with purpose. Your mastery of these frameworks drives transformational learning experiences and cultivates tomorrow’s leaders in tech and creativity.
Keep pushing boundaries, experimenting with new tools, and leveraging Vibecoding VIP’s ever-growing library of resources. Together, we’ll continue to innovate, inspire, and shape the future—one dynamic lesson plan at a time.
You’re ready—go elevate your technology integration lesson plans and watch your community thrive!